Wednesday, December 10, 2014

Holiday Craft/Gift

Every year, my class makes a craft/gift for their families around the holidays. I try to change it up each year because often I have siblings of previous students and I want the gifts to be a surprise to the families. My first year, we made photo calendars. Last year we made coasters. This year I decided to have the kids make winter-themed picture frames. I went to Michael's and purchased everything we would need, then I printed photos from their winter concert here at school. Once the kids got started, it took no time for them to create these adorable frames.

Materials Needed
  • Picture frames from Michael's ($1 each)
  • Snowman adhesive foam decals from Michael's (the entire bin was on sale for $4)
  • Various wintry colors of paint (I let the kids choose what color they wanted to use for their winter sky, and whether or not they wanted black or white paint to tint it.)
  • One Q-Tip per kid
  • Photos of each kid (I could have easily printed these to our school color printer, but I paid a couple dollars to have Wal-Mart print them in the one-hour studio.)
Directions
  1. Kids started by mixing their paint and painting it onto their frames.
  2. Once it dried, they used a Q-Tip to dot on the snow with white paint.
  3. Then they chose all the pieces they wanted for their particular snowman and stuck it onto the frame.
  4. We added the pictures to the frames. Done!
I chose to buy winter-themed holiday sacks and tissue paper and each kid officially "wrapped" their gift. They also made cards to go along with them, but I don't have a picture of the wrapped gifts. The frames turned out great and actually took less time to make than the gifts we've made in previous years. Enjoy!


Friday, December 5, 2014

Desserts for Early Finishers

I was a kid who finished classwork quickly. I would turn in my assignments and be eager to move on to something else. My teachers always told me that I could "read quietly until everyone else was finished". Don't get me wrong, I loved reading. But sometimes, I wanted some variety. In my class, when the early finishers tell me they're done, I say "Great! You may get dessert now!"

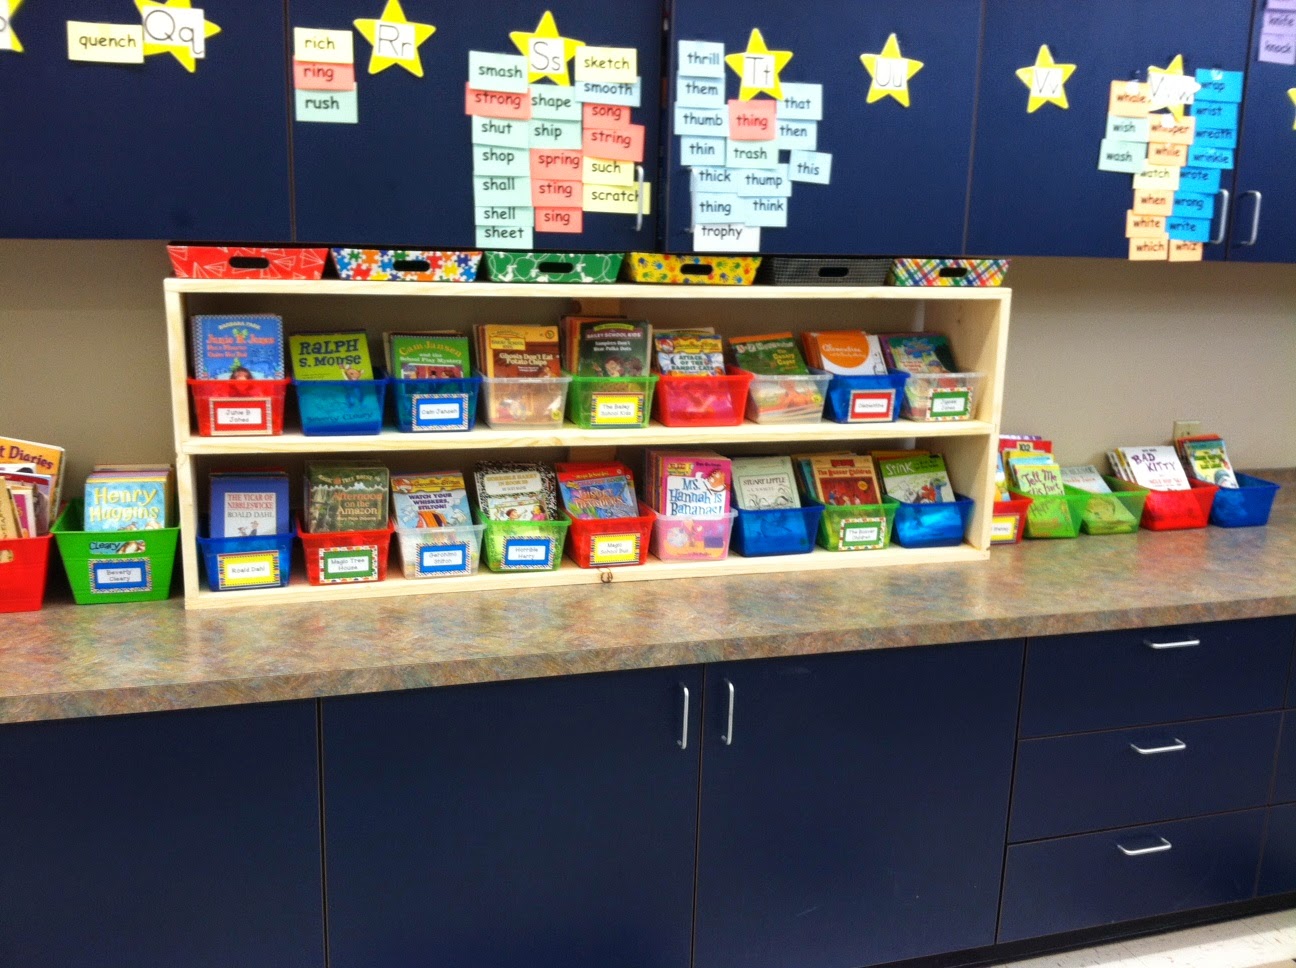
This year I opened a class "Dessert" station. It is a solution for my early finishers that gives them a variety of activities to choose from. I have one tub dedicated to math, one to language arts, and one to "surprises" (anything that doesn't fit in those categories). Students may choose to read quietly when they're done early, or they can choose a dessert to work on. Here are some examples for what are in each of my tubs:

Math

  • A binder full of various activities. I pull a worksheet or activity I like and make multiple copies. Then I slide the stack into a clear sleeve so kids can easily see them as they flip through. Some of the activities have a QR code that kids can scan into with their iPads to complete an online game or activity. When they do this, there is always an exit slip that requires them to answer questions about what they've just done. I have them turn in this paper.
  • Old centers the kids liked. I keep each center in a laminated manila envelope with all necessary pieces, so they're easy to toss in there (and super easy to regularly switch out).
  • Small, boxed math games or card games that the kids have previously learned.
L.A.
  • A binder of various activities (like above).
  • Old centers the kids liked.
  • Writing activities.
  • Favorite class books kids might want to re-read.
  • A list of writing prompts.
Surprise
  • A binder of various science or social studies activities (like above).
  • Class books we've made.
  • Puzzles or brain teasers.
  • Our class "family album" that we made at the beginning of the year.
  • Each child's BAT Book. (I bought these from Molly Lynch on TPT. They are fantastic!)
  • Board games the kids have really liked.

To make the centers more enticing, I let kids turn in their finished work to a special turn-in bucket. Every couple of weeks I randomly draw out a few of these assignments and let the kid who completed them choose something from our class prize bin. The kids are engaged because they have choices, and I always make sure the activities are fresh and relevant to second grade learning.

Click HERE to access my labels for the dessert bins.


Monday, November 24, 2014

Thanksgiving Stories: A QR Code Mini-Book

I've just posted a fun, engaging early-finishers activity for those of you who use scanning devices in your classroom (for examples, iPads). It is a mini-book that uses QR codes to tell various Thanksgiving stories. Students will use their scanning devices to scan each QR code. They will then be brought to various videos that tell them Thanksgiving stories. Most are fun, fantasy stories, but there is a reading of The Story of the Pilgrims. Each page features a different story, as well as an after-reading activity or question that students answer. It creates some fun conversations in class and the kids really look forward to it.

Click HERE to check it out! Enjoy!

Turkey Disguises

I love the book Turkey Trouble by Wendi Silvano. It's a fun story to read to your class around this time of year. It's about a turkey who tries different disguises to keep from ending up on the Thanksgiving table.

Each year, we ask our students to make "turkey disguises" to help save fictional turkeys from the Thanksgiving table. We send home THIS turkey template (it is a scanned version of a template that has been passed down through the years) printed on card stock. We ask them to use their imagination to create a good disguise for their turkey. They can use colors, materials, etc. to create their turkeys. This activity is just for fun, but it sure makes for a neat November bulletin board!


Thursday, November 20, 2014

My "Word Wall"

I've been wanting to share how I decided to do my word wall this year. Normally I use my back cabinets for a traditional word wall that includes various high frequency and hard-to-spell words in alphabetical order. But I noticed that the word skills my kids seemed to need the most help with were the basic word skills we teach throughout the year (parts of speech, homophones, contractions, etc.). So this year I decided to use my back cabinets to showcase various work they've done with each skill that I will leave up all year. I spend one week per skill for the first nine weeks. So by the end of the ninth week, our "word wall" is complete! My students reference it ALL THE TIME! I tried to find and create activities that would help them visually remember the specific skill (for example, we made "synonym rolls" to learn synonyms, and we did a fun foldable to help learn how contractions are made).  I may tweak some activities (or choose entirely new ones) next year, but overall I like this idea of kids being able to reference the word skill as something they have created. Here are pictures of my word wall, as well as links (where applicable) to the different templates I used.

A view of the entire word wall.

We used Frame Magic on the student iPads to act out and label various verbs.

We used Frame Magic on the student iPads to find pictures of and label the different types of nouns: person, place and thing.

Students rotated around to various stations to add their own adjectives (on post-its) to these vivid images I found online.

Students chose homophone pairs to represent in pictures. The word cards and picture templates are part of my "Homophones and Multiple Meaning Words" pack.

We made "Synonym Rolls" in class! Each "roll" had a word at the center. Students used thesauruses to find synonyms for the center words, then wrote them on the spiraling lines. I just hand-drew these onto tan paper.

We did "Poppin' Antonyms" for our lesson. Each popcorn box has a word on it. Students searched to find antonyms for that particular word and wrote them on the different popcorn pieces.

Students made multiple-meaning M&Ms for this activity. They chose a multiple meaning word and wrote two separate sentences for it that demonstrated the different meanings.

This is a traditional compound word activity where students write and illustrate the two separate words needed to create a compound word.

After discussing how apostrophes replace missing words in contractions, students dissected and reassembled their own contractions. See below for a close-up picture of what this looks like open.

A closer view.
I hope you find these helpful!

The Anatomy of the Five Senses

Last year, I made a custom science unit for my second grade class that allowed us to explore the five senses. This unit focuses on the anatomy of the five senses, teaching kids how information travels from the outside world through each sense organ to our brains. It is very hands-on. I spend a week on each sense organ. First we discuss the basics for each sense organ (how information travels to our brains), then we discuss fun facts for that same organ. After that, we spend a day recalling and reflecting on the basic info. Finally, we do an experiment for each sense organ. This is such a fun unit to teach! I have taught it twice now, and both times I have been amazed at how much information my second graders process. They truly learn this stuff ... not to mention, they are highly engaged since it is such a hands-on unit.

Click HERE to check it out. I've included a preview that shows all the pieces for one sense organ, so you get an idea for how I structured the unit. There are even small QR codes on each main page that kids can use to see a cartoon exploration of each sense organ.

That is all for now! I'm hoping to post some other units and activities soon that have been hanging out in my computer for the past year ...

http://www.teacherspayteachers.com/Product/The-Anatomy-of-the-Five-Senses-1570566

Monday, July 14, 2014

Sharing Knowledge at Lausanne

I had a fantastic time at Lausanne this summer! I was lucky enough to get to share some classroom and curriculum ideas by leading four different sessions at the conference this year. I led sessions on:

  • QR Codes for Differentiation
  • iPads in Reading Instruction
  • Class Blogs for Parent Communication 
  • Techy Teacher Tools

If you are looking for handouts from my sessions, please see the posts below. They have all the electronic visuals I used in class. 

I hope you find this helpful!


Sunday, July 13, 2014

QR Codes for Differentiation

Hello! Thank you to all who attended my QR Codes for Differentiation class at the Lausanne Learning Institute. Click HERE for the notes from that session. I hope you have generated lots of new ideas for differentiation in your own class!

Saturday, July 12, 2014

Techy Teacher Tools

Hi all! I want to post the names of some technology tools I have come to LOVE. Each, in its own way, helps make my life as a teacher a bit more successful.

Teacher Kit - This is a grade book app that makes organizing classes, grades and notes very easy. It even shows student performance in visual charts. A great tool to use for parent conferences. Click HERE to access it on the iTunes store.


Evernote - This is an oldie, but a goodie. I used Evernote this year to keep records of student work and assessments throughout each quarter. You can store photos and audio in folders you've created for each student. I referenced it often - especially when it was time to do grades or conference with a parent. Click HERE to access it on the iTunes store.


Socrative - This is an excellent app that can be used for quick quizzes and exit slips for students. It is a great assessment piece, as it gives real-time grading results. Click HERE to access the "teacher" version and HERE to access the "student" version.


SimpleK12.com - This is a professional development site that I LOVE! Any time I am in need of fresh ideas, I cruise through this site and look for an inspiring webinar. There are several opportunities to take free webinars ... but if you do, I wouldn't be surprised if (like me) you end up with a yearly subscription so you can access all their great webinars.


Teacherspayteachers.com - If you have never visited this site, GO THERE NOW! There are hundreds of thousands of resources available that cover a wide range of subjects and skills. All materials are created by teachers. You can even create an account and sell your materials.


This is my short list of go-to's during the school year. I would love to hear what yours are!

iPads in Reading Instruction

Hi Lausanne Learning Institute friends! Thank you for attending my iPads in Reading Instruction class. Click HERE for a PDF of the presentation. I hope you found it beneficial.

Friday, June 13, 2014

Flipping and Blending in the Primary Classroom

This week my school has been hosting a learning consortium and I got a chance to talk to other educators about how I "flip" and blend in my classroom. I shared three main ways I use videos and QR codes to duplicate myself, thus helping make learning more individualized and allowing students to self-pace. The three ideas I shared were:
  • Recording videos of yourself demonstrating how to participate in centers. This saves a lot of time. I find that in my own classroom I spend more time explaining how to do a center than the kids actually spend doing it. Watching a video demonstration allows them to go at their own pace, rewinding when they need clarification. As you can see below, after I make a demonstration video I turn it into a QR code and tape it to the front of the designated center envelope (the envelope contains all the materials for the center, and I always make sure the center directions are glued directly to the front or back of the envelope before I laminate it). You can use this to differentiate by allowing some kids to scan in and watch the demonstration video, while having others who show strength in following directions rely on/follow the written directions.


  • Flipping "lecture-style" lessons where you are delivering straight-forward information. For example, each year we teach the second graders to label all the countries of South America on the map. This takes a long time because some kids write more quickly than others, some kids have a hard time catching the spelling of the countries, etc. And, let's be honest, this probably isn't the most captivating information in general. So I flipped this lesson and let them watch a video of me labeling the countries using quirks and memory tricks to show how to remember where the countries are (Paraguay looks like a parachute, and Uruguay is under Paraguay). Memory tricks such as these might derail a whole-group lesson due to the silliness of the tricks. But individually kids were super engaged and remembered the information well. Not to mention, kids could work at their own pace and rewind to review.

  • Delivering a "sneak peek" of the next day's lessons. I record short mini-lessons that introduce concepts that I will cover in class the next day. Through pre-assessments and class observations, I know pretty well who will need extra exposure to the material. I include these "sneak peeks" on the weekly homework calendar for certain students who would benefit from the early exposure. This way, the kids who might have a hard time grasping information in an introductory whole-group setting will come in feeling comfortable with the material. These homework calendars do not go home with every kid, just the kids needing the sneak peek.

Click HERE for a PDF copy of my presentation talking points. I hope you find this information useful!

Monday, May 12, 2014

Gift for Parents

What parent doesn't love photos of their child? Each year I have made it a point to burn all the images I took during the school year to a disc to give as an end-of-of-the-year gift to parents. I have pictures available for download all year through my class blog, but I've gotten feedback from parents that they didn't have time to download all the pictures they wanted during the year. Giving them a disc of images ensures they have their precious photos long after I've deleted them from my computer. (I also make a copy for myself each year so that I have the photos long after I've deleted them.)

I just went to Wal-Mart and bought a big pack of CD-R discs (I think it was around $13 for 20 discs), as well as a pack of cardboard sleeves (I think they were around $5 for 20). Then I printed a message to put on the front of each case. Here is how they turned out:


If you like this idea and want to pull it together quickly, click HERE for a PDF of a generic template you can use (you will have to sign your name on each one).

Tuesday, May 6, 2014

My New Bookshelf!

I have to give a shout-out to my very-handy husband, Shea. He made me a custom bookshelf to fit a very specific space in my room. I love it so much that I've already asked him to make me two more (one more for more books and one for my math games). Isn't it awesome!?


The Gift of Dyslexia

It has been a nutty quarter and I found that I did not get a chance to post as much as I had hoped to. Needless to say, I wanted to make it a priority to post about this book I recently read called The Gift of Dyslexia by Ronald Davis. We have all had students that have either been diagnosed with dyslexia or show signs of dyslexia. And while teacher education does briefly touch on the topic, I felt like I needed to know more about this condition that affects so many students and adults. A parent of a former student recommended I read this book, and I have to admit, it is the best explanation I've ever read about dyslexia. It is written by a dyslexic man who has developed exercises to help dyslexics control their disorientations. The exercises are outlined in the book for those looking to try them. He has a successful track record of working with both dyslexic students as well as with training facilitators who then go out into the world and help others. It is a quick read and is definitely worth your time. It will give you a new perspective about what is going on in the mind of a dyslexic when they encounter confusion. I hope you find it as insightful as I did!


Friday, April 4, 2014

Germany

March was a very busy month for me (and most teachers). Like in many schools, March is full of end-of-quarter duties as well as wrapping up units to prepare for spring break. Our school's spring break is two weeks long, and this year I was fortunate enough to get to spend it abroad. My school is working to build relationships with other schools around the world to help establish international partnerships, exchanges, etc. So I (along with a colleague from our Upper School) went to Hamburg, Germany as ambassadors to help build a relationship with a partner school. My colleague edited together footage from the trip and HERE is the result (this is a broadcast from our school's television network, so our part actually starts after the initial news is read). I've also included some pictures from the trip below.

It was an incredible experience, to say the least, and I am grateful to work for an outstanding school that offers these opportunities for faculty and students.

What's remaining of the Berlin wall.
One (of MANY) canal in Hamburg. 
Memorial at Neuengamme concentration camp.
A view from the incredible walk to a nearby theater (a field trip the class I was visiting took one day).
The original entrance to Lubeck, a medieval town in Germany.

A view as we walked down a street in a small Germany village.

I got to teach a lesson to a third grade class about Kansas City!

Friday, February 14, 2014

Student Valentine Boxes

Can you tell I love Valentine's Day? I've loved it since childhood. My mom would always buy us heart-shaped boxes of candy. I remember the school parties and fun love-themed decorations ... Needless to say, I love celebrating this holiday with my students.

Here is a cute idea for Valentine boxes. We've done them this way for the past two years. We just have kids bring in a cereal box and then let them cover them in paper, wrap paper arms from the front to the back and glue/tape down cut-outs of their own hands. We then print pictures of their faces and staple them to the back of the cereal box to complete the "Valentine hug" look. They're simple and the kids love them.


"Thank You Valentine" Cards

I always like to acknowledge gifts I receive, so this year I made a "Thank You" card to give kids who brought me a Valentine. I printed them in color, then hand wrote a message to each kid on them. I then laminated them and cut them out so that they double as bookmarks (kids in my room always LOVE getting a new bookmark). Click HERE for the "Thank You" template.

Enjoy!

Wednesday, February 12, 2014

Love, Splat!

For the past few years I have done a Love, Splat writing activity the week before Valentine's Day. I read aloud the book Love, Splat by Rob Scotton. We discuss what love means to them and do a class brainstorm about the different things that make us feel love, and the things we do to show others love. Afterwards, they write a paragraph on what love is, following this simple template for each sentence:
  • I feel loved when ...
  • I like it when ...
  • To show others I care, I ...
  • To me, love means/is ...
Then they use craft paper to cut out hearts and a cat head, paws, tail, eyes, nose and the insides of the ears. (I have them crinkle the tails with an accordion fold to make it look spazzy like the real Splat's.) It is a quick writing assignment that helps students think about love on several levels, and it creates a very cute Valentine-themed bulletin board.


Cute, Affortable Valentine Gift for Students

One of my teammates introduced me to a cute idea for Valentine's gifts for our students. This year, we made bracelets for them. It is super cost effective, simple and meaningful. She had done this with her kindergarten class before and said the kids loved the bracelets and wore them until they fell off. Here are the simple steps involved (the whole idea came from THIS blog post):
  • Make bracelets (with string and a simple braid - VERY affordable, simple and quick)
  • Print templates from THIS site with "Our class would knot be the same without you" message
  • Glue the template to cute craft paper
  • Cut holes with a hole punch and strung the bracelets through
  • Sign each valentine (which I haven't done yet so it's not reflected in the picture, but the signature will be underneath the saying)
Here is the result!